Tunnel - Laser Scanning (LS)
Target of Investigation
Laser scanning can be employed in tunnel inspection for the following applications:
- Identifying surface features, such as damaged tiles, spalling, large cracks, and ingress of moisture.
- Producing surface profiles of the tunnel lining and indicating unexpected displacements.
- Measuring the shape of the tunnel.
- Determining the position of appurtenances mounted on the surface of the tunnel lining (e.g., signage and utilities).(1)
Description
Laser scanning systems are frequently referred to as LiDAR technologies. They typically consist of a scanning head from which a single laser beam is rotated 360 degrees by means of a rotating mirror. The range, which is the distance from the laser head to the reflecting surface, is recorded. For tunnel linings, the laser scanner is sometimes mounted on a vehicle equipped with a suitable encoder or other device to monitor its position.(1) In other instances, the laser scanner may be deployed at stationary positions in the tunnel.(2,3)
The range measured by the laser, the laser’s rotational angle, and the position of the scanner are combined to determine the coordinates of the point from which the laser beam was reflected. Multiple measurements can be combined to provide a three-dimensional (3D) point cloud. Reflectivity data for the surface are also collected and can provide information on surface characteristics, such as materials, surface colors or textures, or the presence of moisture.(1,4)
Physical Principle
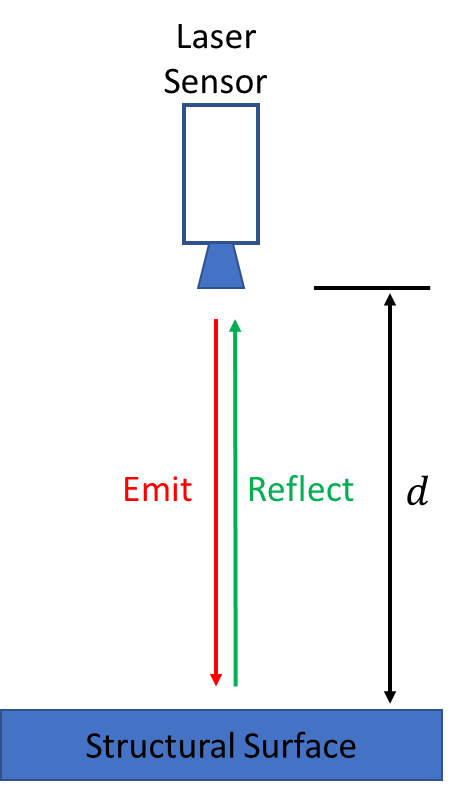
Laser scanning systems typically emit a laser beam that is reflected by solid materials. The reflected laser light is detected, and the range from the laser head to the reflecting surface is determined. Figure 1 illustrates the physical principle of determining range with a laser scanning system. Generally, there are two methods for determining the range from the laser head to the reflecting surface.(5) A laser pulse can be emitted from the surface and then detected. The timeof-flight (TOF) of the laser pulse is determined, and the range is then calculated based on the elapsed time and the velocity of light.(5,6) Figure 2 provides the equation to calculate the range based on this method. This method has low accuracy but is useful for large ranges, so it is typically used for terrestrial and aerial scanning applications.

d = range.
Figure 1. Illustration. Physical principle of laser scanning.

Where:
d = range.
c = speed of light.
t = TOF.
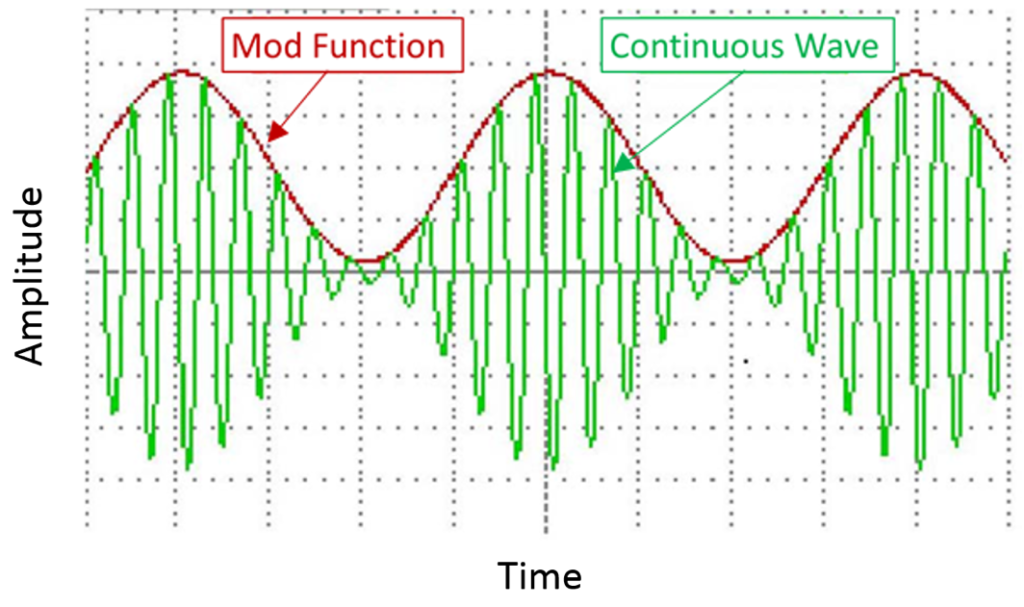
Alternatively, the range may be determined via an amplitude-modulated continuous wave and phase detection of the reflected light.(4,5) Figure 3 illustrates an amplitudemodulated continuous wave. Ranges based on this method can be calculated with the equation in figure 4. Using this method with phase detection is more accurate than using TOF, but the range is typically more limited.(5)

Figure 3. Graph. Amplitude-modulated continuous laser signal.

Where:
d = range.
φ = phase difference of the modulated signal.
f = frequency of the modulated signal.
Data Acquisition
Data acquisition consists of range measurements and reflected amplitudes of light.(4) For tunnels, data acquisition is typically accomplished by mounting the laser scanner on a suitable vehicle and traversing the tunnel. The laser beam is rotated 360 degrees to provide a helical scan of the tunnel shape, including appurtenances such as signage, utilities, etc. The measurement rate of a LiDAR sensor varies but can be hundreds of thousands of samples per second. When data acquisition is conducted from a moving vehicle, the point sampling (points per unit surface area) will depend on the speed of the vehicle and the range and obliqueness of the surveyed surface. Data may also be collected from stationary positions in the tunnel using fiducial markers to provide reference points for integrating multiple scans from different positions.
Data Processing
Data processing typically consists of creating images based on the 3D point cloud produced from the laser scanner. Images are produced from both range and reflectance data. Data processing can involve fitting the point cloud to match the shape of the tunnel to identify anomalies.(3) Dimensional data from the laser scan may be processed to determine internal clearances throughout the tunnel.(1,4) Data from the laser scanner may also be correlated to data collected by other sensor technologies, such as high-definition photography or thermal images.(1)
Data Interpretation
The interpretation of laser scanning measurements typically involves range and reflectance data. Range measurements are interpreted to identify the following:
- Shape of the tunnel.
- Unexpected displacements or shape anomalies indicating potential tunnel damage.
- Locations of the appurtenances and clearance measurements.
- Surface damage, such as missing tiles, spalling, or large cracks.
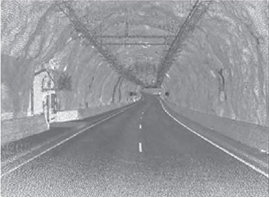
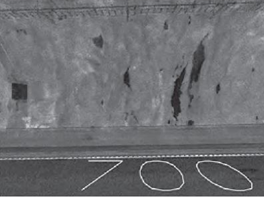
Reflectance data are commonly interpreted to detect the ingress of moisture or variations in material quality that may affect the material’s reflectance properties. Variations in the color or texture of the surface can be detected. Differences in the reflectance may also be interpreted to identify the presence of contaminants, such as sodium chloride. Figure 5 illustrates laser scanning data showing the point cloud and reflectance images of a tunnel.(1)

A. Scan showing tunnel shape.

B. Scan showing surface reflectance.
Figure 5. Images. Laser scanning data of a tunnel.(1)
Advantages
Advantages of laser scanning include the following:
- Data acquisition is rapid.
- Developed models do not have any geometry distortions.
- Localized deformations and clearance limitations are detected.
- Permanent test points or reflectors are unnecessary.
- Scanning is nondestructive and contactless.
Limitations
Limitations of laser scanning include the following:
- Detection of subsurface damage is impossible.
- Laser-incident angle and surface reflectivity can affect results.
- Visibility is limited to line of sight.
References
- Wimsatt, A., White, J., Leung, C., Scullion, T., Hurlebaus, S., Zollinger, D., Grasley, Z., et al. (2013). Mapping voids, debonding, delaminations, moisture, and other defects behind or within tunnel linings, Report No. S2-R06G-RR-1, Transportation Research Board, Washington, DC.
- Han, J.Y., Guo, J., and Jiang, Y.S. (2013). “Monitoring tunnel profile by means of multi-epoch dispersed 3-D LiDAR point clouds.” Tunnelling and Underground Space Technology, 33, pp. 186–192, Elsevier, Amsterdam, Netherlands.
- Wang, W., Zhao, W., Huang, L., Vimarlund, V., Wang, Z., (2014). “Applications of terrestrial laser scanning for tunnels: a review.” Journal of Traffic and Transportation Engineering, 1(5), pp. 325–337, Elsevier, Amsterdam, Netherlands.
- Langer, D., Mettenleiter, M., and Frohlich, C. (2000). Imaging laser scanners for 3-d modeling and surveying applications in Robotics and Automation, Proceedings of the IEEE International Conference on Robotics and Automation, Institute of Electrical and Electronics Engineers, New York, NY.
- Puente, I., González-Jorge, H., Arias, P., and Armesto, J. (2011). “Land-Based Mobile Laser-Scanning Systems: A Review.” ISPRS – International Archives of the Photogrammetry, Remote Sensing and Spatial Information Sciences, XXXVIII-5(W12), pp.163–168, International Society of Photogrammetry and Remote Sensing, Hanover, Germany.
- Yoon, J.S., Sagong, M., Lee, J.S., Lee, KS., (2009). “Feature extraction of a concrete tunnel liner from 3D laser scanning data.” NDT & E International, 42(2), pp. 97–105, Elsevier, Amsterdam, Netherlands.


